You’ve just spent a bunch of money, and if you’ve done it yourself, time.
New sod is a great way to have a lush green lawn to add to the beauty and curb appeal of your home.
Maybe you’re doing it to rehab a lawn and want to establish the grass quickly. Or you’ve bought new construction.

That exceptional-looking lawn can only be achieved by taking good care of your new sod. Watering is one of the most crucial aspects of lawn care, but how long should you water your new sod for?
This post will dive into the best practices for watering new sod, allowing you to achieve the healthiest and most attractive lawn possible.
The Importance of Watering New Sod
When you install new sod, it's essential to provide it with adequate water to help it establish strong roots. Proper watering helps the grass remain hydrated and nourished, which enables it to grow and spread evenly across your lawn. Without sufficient water, the sod will fail to thrive, leading to a patchy, brown lawn that's far from the lush, green oasis you envisioned.
How Long to Water New Sod: A Step-by-Step Guide
1. The First Week: Frequent, Shallow Watering

During the first week after installation, your new sod requires frequent, shallow watering. This means watering the new sod several times a day, ensuring that the top one inch of soil remains consistently moist. This level of moisture will encourage the sod to establish roots in the soil quickly.
2. The Second Week: Gradual Reduction in Watering Frequency
As you enter the second week, it's time to start reducing the frequency of your watering sessions. Reduce your watering to once a day, ensuring that the soil remains moist to a depth of 1-2 inches. This will promote deeper root growth, which is essential for the long-term health of your lawn.
3. The Third and Fourth Weeks: Deep, Infrequent Watering
By the third and fourth weeks, your new sod should be firmly rooted and ready for deeper, less frequent watering. At this stage, water your lawn every other day, soaking the soil to a depth of 3-4 inches. This encourages the roots to grow even deeper, enhancing the lawn's drought tolerance and overall resilience.
4. Beyond the First Month: Adapting to Your Lawn's Needs
After the first month, your new sod should be well-established, and you can transition to a standard watering schedule. This typically involves watering your lawn once or twice a week, depending on your local climate and soil type. However, it's essential to remain attentive and adjust your watering practices based on your lawn's appearance and growth patterns
.
Putting In New Sod (My Story)
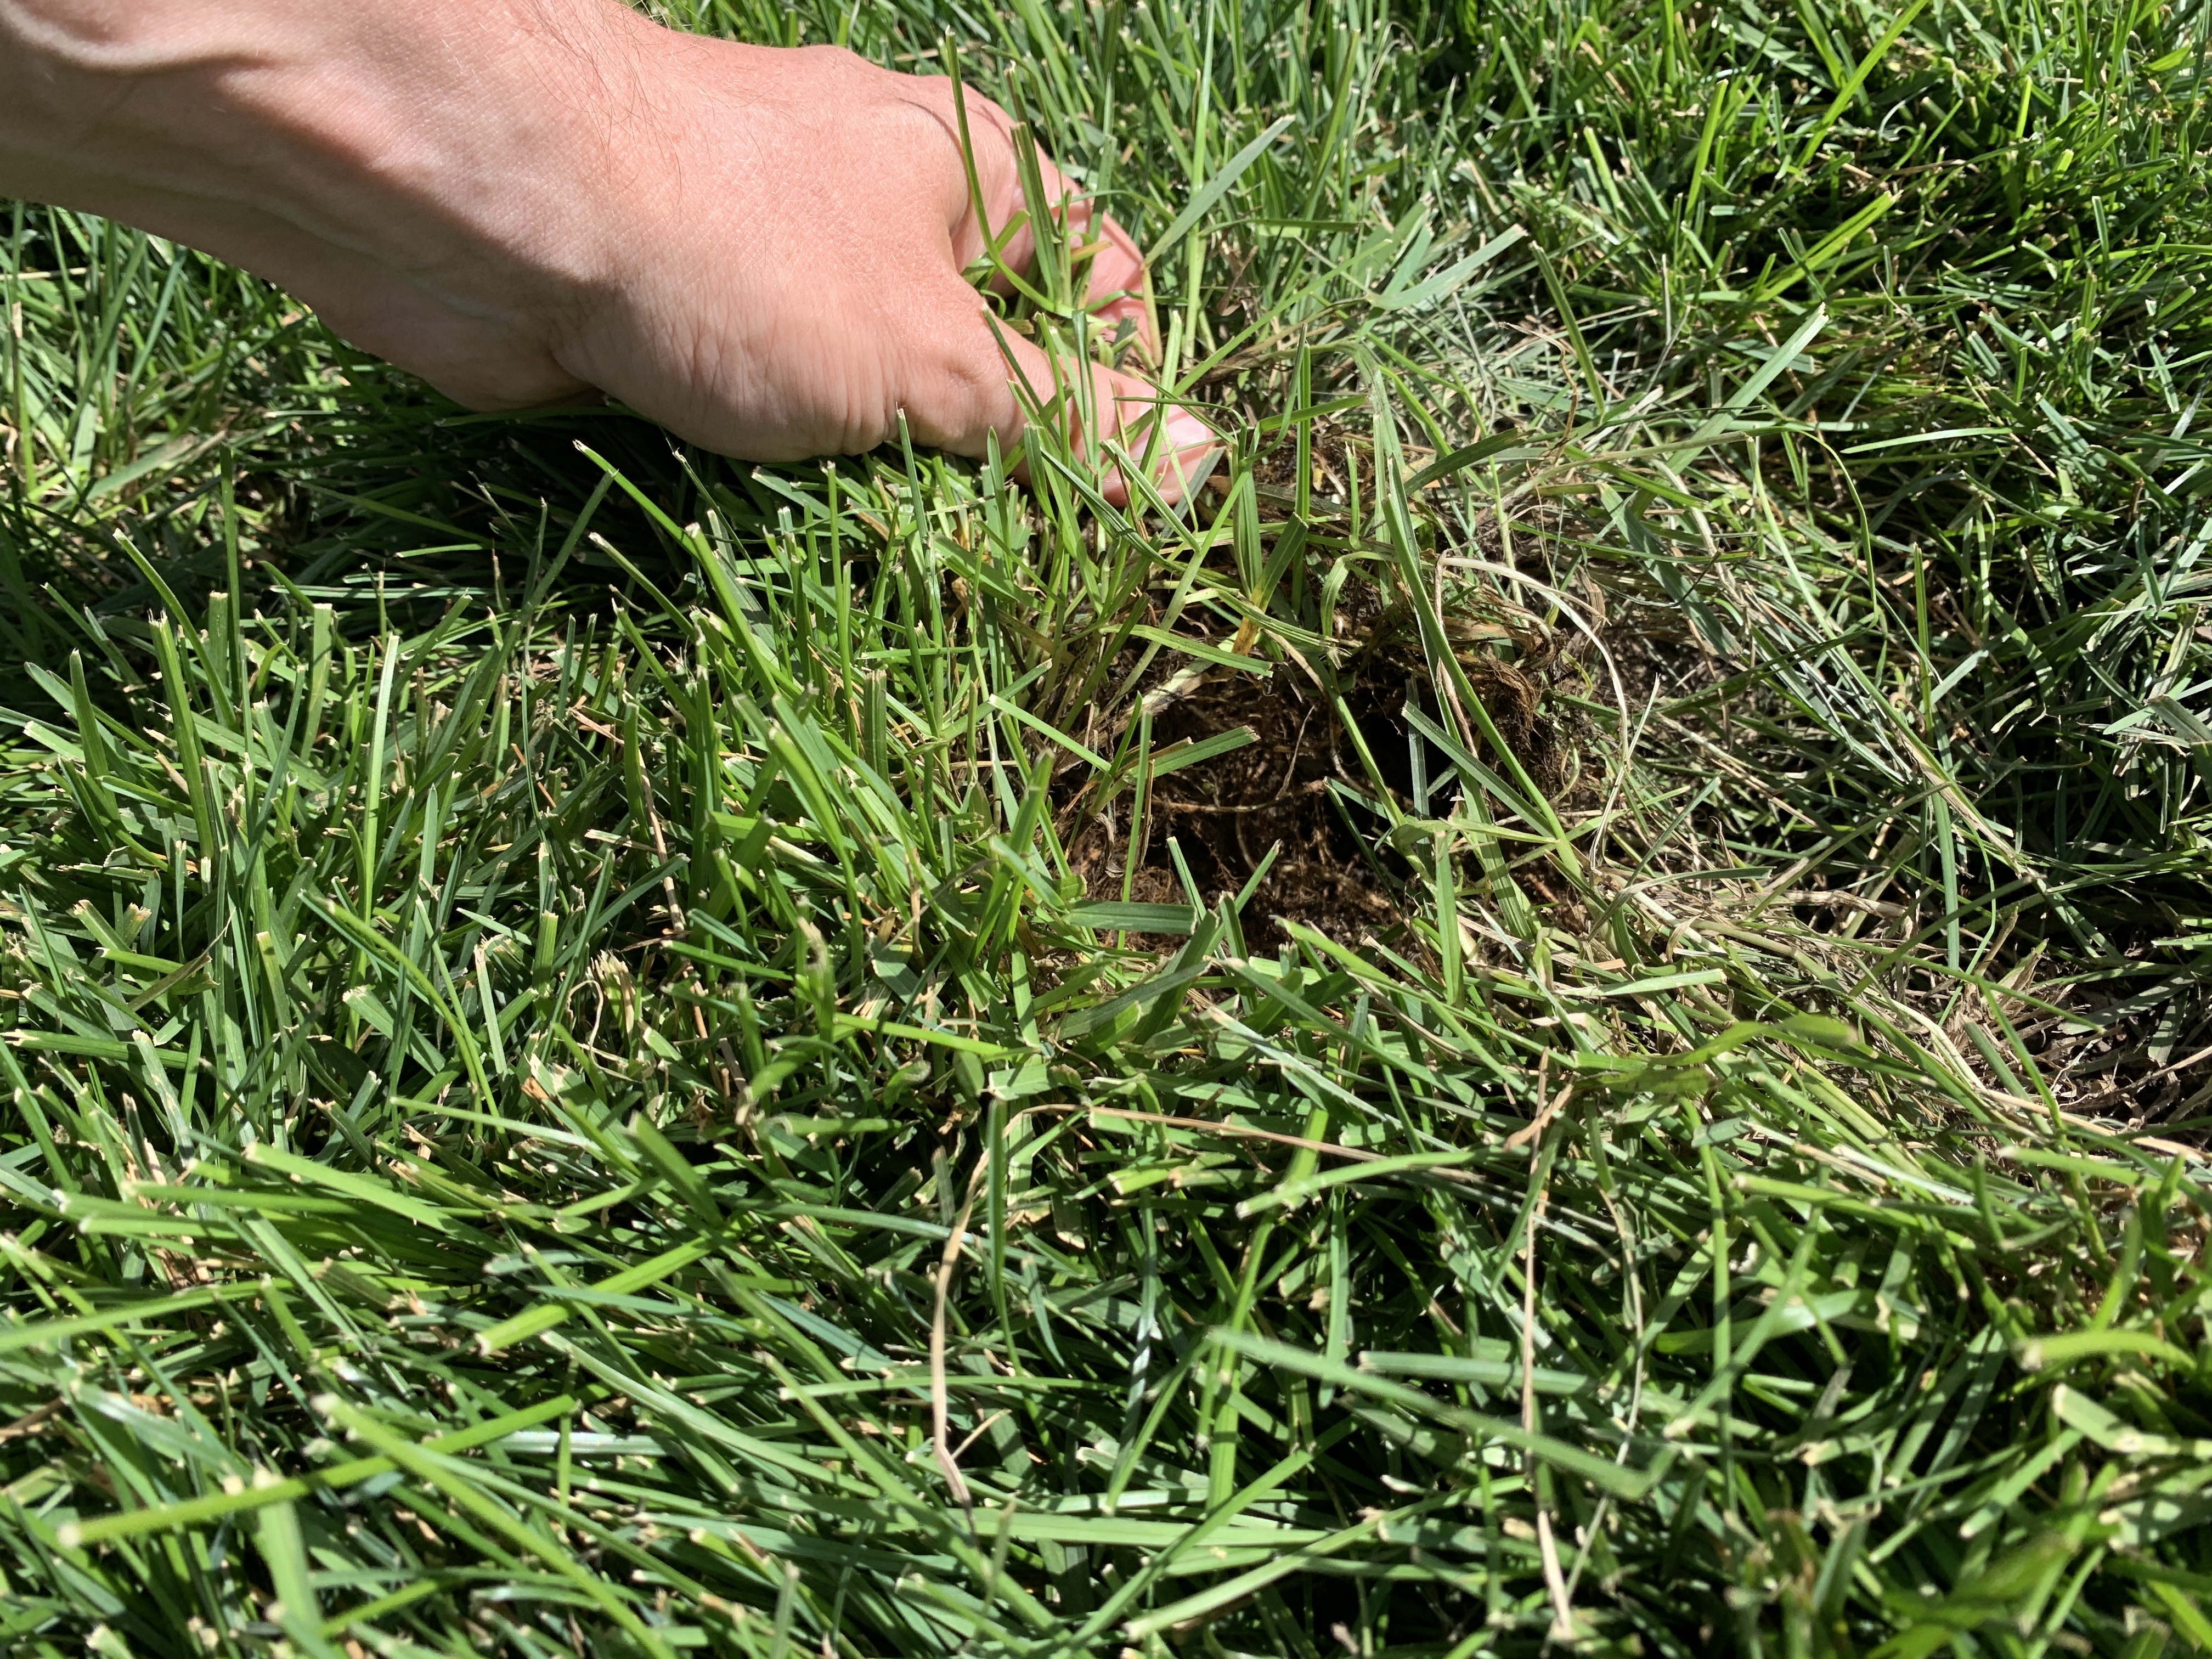
When we bought our new construction, the front yard already had sod put down. As many new construction homes in Post Falls do.
Unfortunately, the sod did not root.
Despite my efforts, it seemed like a wasted endeavor. All the water I had diligently poured onto it simply flowed down the sloping ground, eventually spilling onto the sidewalk and seeping into my neighbor's yard. But I wasn't ready to give up.
Determined to make things right, I decided to remove all the sod. I carefully pulled it out, knowing that a fresh start was necessary.
Next, I brought in new topsoil. I put down fertilizer in the new topsoil, to help the new sod get a boost.
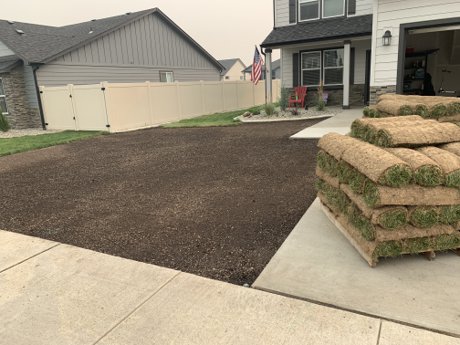
Finally, it was time to lay down the new sod. I took it upon myself to do the job myself. Carefully unrolling each section, I fit them together like puzzle pieces, creating a smooth and beautiful lawn. From that point on, I took care of the new sod with dedication.
I watered it with the schedule I outlined above.
The sod finally took root and began to flourish.

It was finally a success.
It hasn't even been a year and the new grass is thriving.
Rooted solidly.
Growing in thick.
And spreading.
The Big Takeaway
Of course watering new sod is critical to the success of having a healthy lawn.
But without good topsoil, carefully laid sod, all the watering won't matter.
Make sure you have good top soil, healthy fresh-cut sod and that it's carefully laid.
Conclusion
Watering new sod correctly is crucial in ensuring that your lawn looks its best and maintains a healthy growth rate. By following the guidelines outlined above, you'll be able to provide your new sod with the optimal amount of water, enabling it to thrive and grow into a lush, green oasis. So, don't hesitate to invest time in watering your new sod properly - you'll be rewarded with a stunning lawn that's the envy of your neighbors!
FAQs About Watering New Sod
Q: What is the best way to water new sod?
The best way to water new sod is to start by providing it with frequent, shallow watering during the first week after installation. Water the new sod several times a day, ensuring that the top one inch of soil remains consistently moist. During the second week, reduce the frequency of your watering sessions to once a day and ensure that soil remains moist to a depth of 1-2 inches. By the third and fourth weeks, your new sod should be firmly rooted and ready for deeper, less frequent watering; water every other day, soaking the soil to a depth of 3-4 inches. After the first month, transition to a standard watering schedule: typically once or twice a week depending on local climate and soil type. Be sure to adjust your practices based on your lawn's appearance and growth patterns as needed.
Q: Should I fertilize my new sod?

Yes, it is recommended to fertilize your new sod. Lawns need nutrients like nitrogen and phosphorus for growth and greening up. Fertilizers help to replenish these essential nutrients, giving the new sod a boost of energy to help it establish stronger roots and become green faster. It is best to wait until the third or fourth week when the roots are more established before applying fertilizer. Be sure to follow the directions on the fertilizer packaging for proper application instructions.
Q: How often, how soon should I mow my new sod?
It is best to wait at least 4 weeks before mowing your new sod for the first time. This allows the sod to establish strong roots and become well-established. After that, you should mow your lawn regularly (at least once a week) depending on how quickly it grows. Be sure to use a sharp blade as this will help the grass stay green and healthy while providing an attractive finish. Maintain a height of two to three inches throughout most of the growing season for best results.
By following these guidelines, you’ll be able to provide your new sod with all the care and attention it needs in order to thrive in its new home! With proper watering, fertilizing, and mowing, your lawn will remain lush and healthy for years to come.
Q: How long does it take for new sod to become established?
On average, it takes about 4-6 weeks for new sod to become established. During this time, it is important to provide the new sod with frequent, shallow watering during the first week and then reduce the frequency of your watering sessions as you enter the second week. By the third and fourth weeks, your new sod should be firmly rooted and ready for deeper, less frequent watering. After the first month, you can transition to a standard watering schedule: typically once or twice a week depending on local climate and soil type. Be sure to adjust your practices based on your lawn's appearance and growth patterns as needed.
Q: What is the best time of day to water my new sod?
The best time of day to water new sod is in the morning, between 6am and 10am. This will allow you to provide your lawn with the right amount of moisture before it becomes hot and dry outside. Watering during this time also helps reduce evaporation as well as disease problems that can arise from overwatering or watering too late in the day. Additionally, watering your new sod in the morning gives it plenty of time to absorb moisture throughout the day, enabling your grass to become firmly established fast.
Q: How do I know if my new sod is taking root?
It's easy to see if your sod is taking root. Gently pull up on one corner of the sod. If the roots are not fully developed, the plant will come out easily when lifted. If the sod is difficult to lift, it means that the root system has developed properly.


 Whatever project you choose to do, make sure it’s something that is both practical and aesthetically pleasing. This way, whether you decide to stay or sell, everyone who visits your home will appreciate the improvements you’ve made.


 Here's the thing: Instead of stressing over trying to time the market, focus on finding the right time for you.


 Many sellers are stuck in the past. They remember seeing a price for their home at the peak of the real estate market. And they want to price their homes as if it were still a hot market.
 Before you start to worry about your home's closing day, the curb appeal, home staging or what home improvement projects to focus on, you'll want to get in what we call, the HOME IS SOLD MINDSET.
 If you want to know how to sell your home for more money, don't settle. Sure it will sell in these seller real estate markets, but could you have got more money?

 According to a study by the National Association of Realtors, listing videos result in higher conversion rates than listings without videos. This makes sense when you think about it.
 Real Estate Agents, Video and Paid Ads
 Once you start getting offers the real work begins.


 Your income is another important factor when applying for a mortgage. Lenders will want to make sure that you can afford the monthly payments, so they will look at your income and compare it to your monthly expenses. If your income is too low, you may not be able to qualify for a mortgage.
 No matter where you end up getting your mortgage from, it's important to shop around and compare offers from multiple lenders before making a decision. This will help you ensure that you're getting the best deal possible on your loan.
 One option is to take out a personal loan from a bank or credit union. Personal loans usually have lower interest rates than credit cards, making them a more affordable option. However, they typically have shorter repayment terms, which means you will have to pay off the loan sooner.

 Adding a porch or deck to the back of your barndominium is a great way to enjoy the outdoors. Not only will it give you some extra space to relax, but it will also add some much-needed curb appeal. A porch or deck can also be a great place to host gatherings or cookouts with friends and family.
 When planning out the design of your second story deck, it's important to consider things like size, material, and height. You'll want to make sure that the deck is big enough for people to actually sit on and use comfortably.
 While it's possible to make a Barndominium look like a house, some people may not want this type of structure to look too traditional. If this is the case for you, there are a few things that you can do to help make your barndominium stand out.
 Another option is to consult with a professional about the best ways to achieve the look you desire for your barndominium. With their help, you can create a space that truly reflects who you are and what you love. Whether you want to create a more traditional appearance or simply personalize your home, there are many options available to help make this possible. So if you're looking for the perfect way to make your barndominium unique, don't be afraid to get creative and explore all the possibilities!
 If you're interested in making your Barndominium look like a house, you may want to consider contacting a professional designer or builder for help. This could include professionals such as architects, contractors, or home improvement experts. By working with someone who has experience and expertise in this area, you can ensure that your barndominium looks exactly how you want it to, while also meeting all your functional needs.


 Featuring more than 1,600 acres of skiable terrain, Silver Mountain has something for all levels of skiers and snowboarders. The mountain is divided into two parts - the Gondola area and the Mountain Haus area - each with its own unique appeal. The Gondola area offers more beginner runs and groomed paths, while the Mountain Haus area offers more challenging terrain for advanced skiers and snowboarders.


 The Vista House was completed in the winter of 1933 and then completely renovated in 2002. It is constructed of native granite stone and timber framing. The great stone fireplace is the center of the structure, beckoning visitors to enjoy a warm drink and put their feet up in front of the fire.