

Barndominiums have started gaining popularity among homeowners throughout these last few years. These affordable, durable structures make for an excellent base upon which you can create some of the most beautiful living spaces. There are pros and cons to barndominiums, one of the cons can be the poor insulation. Given that barndominiums are usually metal, a material notoriously known for its poor insulating properties, those living in especially hot or cold climates might need to equip their structure with insulation themselves.
Here’s how to insulate a barndominium:
- Find the correct type of sheet foam.
- Gather your tools.
- Measure and cut the sheets.
- Secure the sheets.
- Seal the joints.
- Apply your paint of choice.
Keep in mind that this approach (using foam sheets to insulate your barndominium) is just one of the many alternatives you can opt for when providing your structure with the insulation it requires. Therefore, in this article, I won’t only take you through a step-by-step explanation of how to install the foam sheet set-up in your space, but I’ll also delve into some other approaches you can use to insulate your barndominium.
1. Find the Correct Type of Sheet Foam
When it comes to their insulating properties, not all types of sheet foam are created equal.
The ideal choice for your space can vary depending on your:
- Needs
- Aesthetic requirements
- Budget
Generally speaking, there are two main types of insulating foam boards that you can use. Let’s take a look at these materials and discuss their benefits and drawbacks so that you can decide which one is best for you:
Polyurethane
Polyurethane is one of the most popular choices among homeowners since it makes durable, long-lasting, insulating materials. Polyurethane is flexible and excellent at maintaining a stable interior temperature, but it’s also naturally equipped with sound-proofing qualities.
No matter how extreme and varied the climate conditions are, this type of insulation always maintains a comfortable living temperature inside a space. Furthermore, the material is waterproof and able to withstand strong winds and rainfall just as well as it can withstand freezing temperatures.
Polyurethane comes in various forms and applications. However, foam sheets are one of the most affordable and efficient alternatives since they are so easy to cut and install on your own.
Polyisocyanurate
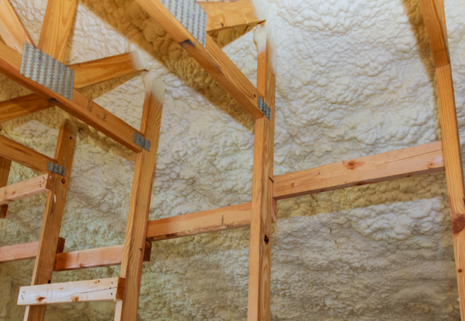
While similar to the previous alternative, polyisocyanurate is its own category of insulating material. Unlike its polyurethane counterpart, which, as mentioned, can be purchased in a wide range of states and forms, this insulator is only available as a closed-cell rigid foam board.
The material is popular for its durability and strength. However, if you’re looking for flexibility, polyurethane might be better.
Given that its cells are pretty closely-set, their bonds are virtually indestructible and block out extreme temperatures and ear-screeching noises. This quality allows polyisocyanurate to act as a moisture barrier that keeps rain, snow, and general humidity away from your precious furniture.
However, polyisocyanurate isn’t as fantastic at keeping out heavy rainfall. So, if you live in an area that’s very often affected by rains throughout the year, it might be a good idea to amp up the waterproofness of the material by coating it with a layer of oil-based solution.
Not only is polyisocyanurate an excellent, affordable insulator, but it has also performed remarkably well on fire tests. That’s another reason so many owners choose to create living spaces within their barndos, as the durable metal frame (as opposed to the traditional wood) combined with this highly fire-resistant insulator makes for unparalleled safety as far as real estate options go.
Even though having to insulate your home separately might not be a homeowner’s favorite pastime, you can’t deny it gives you a level of flexibility that traditional housing structures don’t.
You’ll be able to pick and choose the type and level of insulation that fits your needs and budget best.
For example, it’s up to you whether you choose to add the rigid boards only to one or two walls, all of them, or if you throw in some ceiling and roof insulation for good measure.
Owens Corning Insulation Foam
If you’re looking for a piece of practical advice when it comes to finding the correct type of sheet foam for your barndo, this section is for you. No matter the size and shape of your space, you can never go wrong with Owens Corning Insulation Foam (from Amazon).
The package comes with various different-sized pieces, perfect for you to fill out even the most difficult crevices. You will be able to cover larger areas like walls and floors quickly, and you’ll also be able to insulate around doors and windows seamlessly.
The foam is water-resistant, making it an excellent choice even for those living in high-humidity climates. This foam is guaranteed to maintain its strength and durability throughout its impressive lifespan, no matter the weather conditions.
However, don’t let this impressive strength trick you into thinking the foam will be challenging to cut and manipulate. You can easily shape the material to your heart’s desire by cutting with a razor and hot knife. Therefore, this option will still do the trick even if you want to insulate a uniquely-shaped barndominium.
Those with a specific aesthetic goal don’t have to worry about the material’s pink color, as its porous surface retains paint and drywall adhesives excellently.
2. Gather Your Tools
Now that you’ve found the perfect type of sheet foam for your barndo, it’s time to gather your tools. I’ve chosen to expand on this particular insulating approach because it’s by far the easiest to accomplish yourself, with minimal time and effort.
Therefore, luckily, the tools you’ll need to gather before starting the project will likely already be inside the toolbox in your garage. Here’s what you’ll need to insulate a barndominium using foam sheets:
- A large, clean work table: A table is where you’ll measure, cut, and shape the individual sheets, so it must be sizable enough and free of any dirt or debris.
- Tape measure: As I mentioned, there’ll be much measuring taking place in that sizey, clean working table of yours. Therefore, getting your hands on the right tool to make measurements can be crucial. After all, you want to approach this project with the utmost care and precision if you're going to have any chance of succeeding at it.
- Razor, hot knife, or another cutting tool: After you’ve measured your pieces, you’ll want to make sure you cut them with a sharp, effective tool that doesn’t leave any uneven edges. Investing in the best product you can get your hands on is advisable, as the cleaner the cut, the more professional your result will look (and feel).
- Industrial-grade adhesive: Industrial-grade is the operative word here. You’ll want to invest in a compatible, premium-strength sealant that will be able to keep the foam sheets in place for decades on end. Again, this isn’t the time to budget, as this choice will make a significant difference in the longevity of your insulation. Make sure the glue you choose works well with the foamy material and doesn’t damage it.
- Drill hammer: As you can imagine, you can’t only rely on a layer of adhesive when setting up an insulating system in your home, no matter how powerful it is. Therefore, you’ll want to invest (if you haven’t already) in a drill hammer that can help secure the foam sheets into the structure.
- Concrete fasteners: These will allow you to seamlessly secure your sheets without worrying about rust and wear weighing them down over time.
- Sealant (or tuck tape): As you’ll see in one of the following sections, no matter how well you cut and place your foam sheets, you’ll always need to fill in the joints using a high-quality sealant.
- Spray foam: Although you’ve chosen to use the insulating material in solid sheet form, you’ll still need some malleable materials to insulate those hard-to-reach spaces. You can never cut even the most customizable foam sheets in the market (like the Owens ones mentioned above) with such precision to reach any dent or crevice. In these instances, spray foam comes in handy.
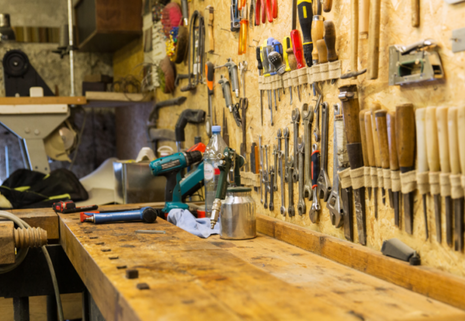 After gathering your materials, it’s best to preemptively go through the following sections and make a rough plan for your project. You won’t need to follow every step to a T, but understanding what the process entails beforehand will help you go into the project more confidently.
Additionally, it’ll help if you carry out some rough measurements at this point. I’ll get down to details in the following steps. However, for now, it can help to have some rough estimations regarding the size and number of foam sheets you’ll need.
3. Measure and Cut the Sheets
It’s time to put that worktable of yours to good use. Before attempting the adhesion process, you’ll want to have all your foam sheets measured out, cut, and ready to install. You don’t want to go back and forth between cutting and securing the sheets, as this would make for a far less efficient (not to mention sloppier) project.
Therefore, you’ll first want to calculate the number of sheets to insulate the entire area of choice. Regardless of whether you’re looking to insulate a wall or your barndominium’s whole interior, you’ll want to measure out the total square footage and divide it by the square footage of each foam sheet.
For example, say you want to cover an area of 1000 square feet (93 square meters). If you were using Owens 15’’ by 12’’ (38 by 30.5-centimeter) foam sheets, you’d first want to calculate each sheet’s square footage. Through multiplying 12 and 15, you’d get an area of 180 square inches or 1.25 square feet (0.12 square meters).
Now, all you have to do is divide the 1000 square feet you want to insulate with the area of each foam sheet (1.25 square feet or 0.12 square meters), and you’ll get the number of sheets you’ll need to complete the project (in this case 800).
However, if you want to cover some uniquely-shaped areas, this might call for more extensive measurements and calculations.
After you’ve mapped out your project and calculated your requirements, it’s time to get each sheet into your table (at least the ones that need to be re-shaped or re-sized), mark them, and cut them along the markings using the sharp cutting tool of your choice.
Repeat the process until all pieces of sheet foam are ready for installation.
4. Secure the sheets
As you may have already gathered by the tools I've listed in the previous section, securing the sheets will not be a one-and-done deal. First of all, there’s a wide range of approaches you can choose from when installing your foam sheets, and the method you opt for will depend on your skills, budget, time, and requirements.
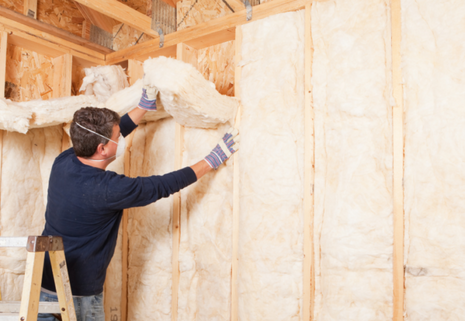 However, generally, you’d want to go for a solid mix of several securing approaches to ensure that your insulating material will stay in place for decades. The last thing you want is a loose piece of foam falling from the ceiling when you least expect it.
I’ve already mentioned adhesive, fasteners, and drills as crucial tools in the installment process. However, don’t hesitate to experiment with this step and get your hands on any additional materials and tools that you think would better help the foam sheets stay in place.
For example, some may even use staples and tape throughout this process, so don’t be afraid to get creative.
However, if you’re one of those people who feel more comfortable using a practical, step-by-step approach, here’s what you’ll need to do to secure the sheets in place:
- Apply adhesive to each foam sheet by following the manufacturer’s instructions and secure the material into place. Generally speaking, no matter which other methods you choose to include to attach the sheets, using adhesive first is a must. No other approach will be able to secure such a large surface area of the material, which can prove to be crucial after a few years of use.
- Press against the foam sheet for 30-60 seconds. First, apply the adhesive in straight, parallel lines on the back of the insulating material and place it on top of the surface. Then, press firmly on its surface for 30-60 seconds until the adhesive has dried out enough to hold the material in place.
- Leave the adhesive enough time to dry. Depending on the brand you choose, this timeframe may vary. However, always ensure to leave the adhesive enough time to harden and dry before moving on to any other approaches.
- Secure the sheets using any other approaches. By this point, the sheets should be sturdily set in place. However, it’s crucial to ensure they’re as secure and immovable as possible. For this reason, you’ll want to aid the adhesive by using staples, concrete fasteners, or even tape (which is an excellent way to ensure your insulation resists different-temperature airflow).
- Repeat the process until the whole area you’re looking to insulate is covered. This step is pretty self-explanatory. After getting the hang of the procedure, the time and effort you’ll have to put into it will depend on the size and complexity of your particular project. However, regardless of the circumstances, by following the previously mentioned steps, you’ll always be able to carry the process out with the utmost efficiency.
5. Seal the Joints
Now that your sheets are in place, it’s time to insulate the joints (the empty areas between two adjacent sheets). No matter how closely and carefully you place each piece of material, there will always be some space left from which heat or moisture could escape. For this reason, you’ll want to seal these spacing using either tuck tape or any other type of sealant you can get your hands on.
Afterward, you can use some spray foam to fill in any remaining gaps or insulate any hard-to-reach spaces.
6. Apply Your Paint of Choice
Your barndominium insulation is almost complete. All that’s left now is to do now is to alter its design in whichever way fits your aesthetic best. Luckily, as I mentioned, the foam sheets’ porous surface makes for an excellent base on which any paint will show up great.
You can use any type of paint you can get your hands on during this process, either water-based or acrylic. However, try to steer away from oil-based options, as they often contain chemicals that may damage the insulating material.
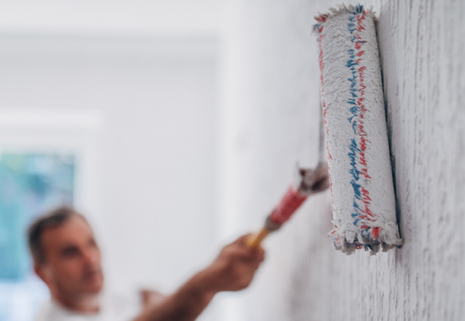
After painting your space’s interior and letting it dry, you’ll have fully insulated your barndominium. As you saw, the whole process is as quick and straightforward as it gets, and it can take anywhere from a few hours to a few days depending on the size of your barndominium.
Alternative Ways To Insulate a Barndominium
As I briefly mentioned, I chose to dive into the sheet foam approach in this article because it’s the easiest and most practical way to insulate a barndominium yourself. However, if this method doesn’t bode well with your requirements or budget, there are many other excellent alternatives to choose from.
Rigid Board
Rigid board insulation involves several stiff boards, usually made out of fiberglass. You can mount them on your barndominium’s walls, floor, ceiling, or roof to insulate your space. This approach is usually the most popular among homeowners, as it’s the most efficient and longest-lasting of the bunch.
However, rigid boards can be tricky to install by yourself, especially if you don’t have any previous experience in these projects. Therefore, you’ll most likely need to hire a professional if you choose to go this route.
Blanket Insulation
Blanket insulation (or, as you’ll often find it referred to, Blatt insulation) is the most traditional approach to insulating a barndominium. Furthermore, it’s also the most affordable, making it an ideal choice for homeowners on a budget.
The material comes shaped into rolls, which you can then unfold, measure, and cut into shapes before mounting, just like you would with your foam sheets. Because it is soft and blanket-like, it’s easy to cut and pack into your walls tightly. So, if you accidentally make a piece too big, you can still use it on your walls.
It is highly customizable, and you’ll likely be able to install it yourself following similar steps to the ones described in this article, cutting down on the method’s costs even further.
Loose-Fill Insulation
Loose-fill insulation uses loose fibers, pellets, or even shredded and recycled paper that you can blow between your walls’ cavities. Loose-fill is one of the most popular choices for homeowners who want to insulate an existing barndominium.
It’s one of the costliest alternatives on this list, but the insulation it provides is unparalleled. This approach ensures that every last nook or cranny from which air (or sound) may escape gets fully covered and insulated.
Spray Foam
Lastly, you can insulate your barndominium using spray foam. You’re already familiar with the material, as I’ve already advised you to use it to complement your sheet foam approach. However, did you know that you can insulate the whole interior of your building using this method?
Spray foam is one of the most popular insulation techniques among homeowners. The material is sturdy, malleable, and highly effective. However, you will need to hire a professional to get the job done, as attempting to do it yourself would do more harm than good.
Considerations To Keep in Mind When Insulating a Barndominium
Regardless of the approach, there are some considerations you’ll want to keep in mind before insulating a barndominium.
- It’s essential to research and know your local laws and regulations regarding building requirements. You’d be surprised how many materials local governments ban. Therefore, taking the time to check beforehand can save you from stress and headaches.
- Regardless of the material you choose, you should always consider its R-value, a number that describes how efficiently a medium insulates and prevents heat transfer between two environments. You can learn more regarding the concept here.
Final Thoughts
Insulating a barndominium doesn’t have to be as challenging or time-consuming as it may sound. Depending on your skill level, preferences, and budget, you can choose between five equally efficient approaches to turn any cold, metal structure into an inviting living space.
Even though many people think about a barndominium as a housing alternative and a way to save money by building a barndominium, insulating a barndominium is not a place you want to cut costs or short cut.
And keep in mind that if you want your barndominum to last 100 years use the right materials in construction, and keep up with the maintenance.

