

When I got my first house with a yard in the Pacific Northwest I was excited about:
Having a yard for my dog, walking barefoot through the backyard with a cold beer and letting my children (whenever we had them) play in the lush, green grass.
It became evident to me after - first, trying to grow grass myself (if I would write a blog on that process it would be under the fail category) and then hiring a professional to seed the lawn, 50% of the backyard still turned to weed and moss - growing grass where it constantly rains, the sun never shines, and the homes are packed so close together throwing shade over everything... is really, really, really hard.
Watch The Video Of The Backyard Makeover
This HOW TO DO A SIMPLE DIY BACKYARD MAKEOVER is for anyone who is on a budget and lives or is looking to buy a home in Lake Stevens, Everett or Bothell area.
Obviously, if you live somewhere else, close by or not, and you find value in this HOW TO, that's awesome!!!
But if you live in this area or are looking to buy a home, you know, most likely you're looking at new construction or a home built after 2010.
And that probably means a home with a small backyard.
So if you have a small backyard or you'll be buying a home with a small backyard, are wanting to spend more time in it and are looking to do a backyard transformation, keep reading this HOW TO on how we did our simple backyard makeover for under $1,000.
Chapter 1: WHY WE DID A BACKYARD MAKEOVER
Chapter 2: WHY A PEA GRAVEL PATIO vs CONCRETE or DECK
Chapter 3: WHAT YOU'LL NEED FOR A DIY PEA GRAVEL BACKYARD ON A BUDGET MAKEOVER
Chapter 4: HOW TO DO A PEA GRAVEL PATIO
Chapter 5: HOW MUCH DID THIS BACKYARD MAKEOVER COST? (+ Where To Get Everything)
Why We Did A Backyard Makeover
CHAPTER 1

Why A Pea Gravel Patio
CHAPTER 2
What You'll Need
CHAPTER 3

How To Do A Pea Gravel Patio
CHAPTER 4

Chapter 1: WHY WE DID A BACKYARD MAKEOVER
We're now in our second home with a yard.
This home was brand new construction.
The builder did the landscaping.
.jpg)
If I wrote a blog about this landscaping it would also be filed under fail.
After living in the house for over 18 months we have maybe spent a handful of days in the backyard.
There was no reason to spend any time in our backyard.
It's small. It doesn't get any sun. The patio is too small to have our table and chairs on it.
The backyard was a wreck.
It was weeds, moss and mud.
It was having a hard time growing any grass.
The other section of our yard though, oddly enough was fine.
It was like a Mother Nature drew a line down the backyard and decided - grass on this side, weeds on the other.
Luckily enough before this summer started we did a Persinger Family trip to Suncadia.
During that Suncadia trip I was inspired by the homes there. The design of the backyards and patios were made to interact with the outdoors.
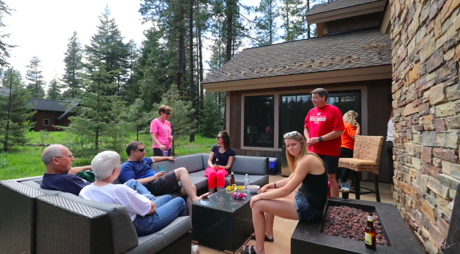
The house we stayed in had a nice enough outdoor area. A big concrete patio area with a gas fire pit and a gas grill.
As a family, we spent most of our time outside on the patio, during the day and night.
But it really hit me - the focus on outdoor living - when my brothers, dad and I went golfing.
Seeing all the Suncadia homes backed up to the golf course with their backyard patios, fire pits, outdoor kitchens, hot tubs, etc, all set up to take advantage of outdoor living, really inspired me to do something more and transform our backyard into a place where we would actually spend time.
WHY A PEA GRAVEL PATIO?
Why did we do a pea gravel patio vs a concrete patio?
Or why not do a backyard deck or just lay pavers, instead of a pea gravel patio?
Pea gravel patio vs concrete patio was because it was more affordable, I could do it myself and I wouldn't have to worry about water drainage issues. Doing a concrete patio in a small backyard felt like a lot more trouble than what it was worth.
Pea gravel patio vs deck: Our little backyard is not level. Again, I wanted to do this backyard transformation project quickly and cheaply.
I've been involved in building decks before. It's a slow process if you want to get it right.
You have to constantly check your levels. You're most likely going to involve concrete or cinder blocks into the deck project, for securing your posts. It gets time-consuming and tedious to build a deck. Then of course you have maintenance and upkeep on the deck.
Are Pea Gravel Patios Safe For Kids?
 We also wanted our backyard patio a safe place for our 2-year-old to play.
We didn't want to worry about Lil' Mo getting slivers and tripping on boards.
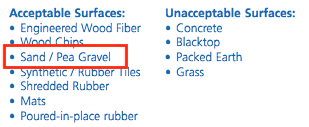
The National Recreation and Park Association had a safety booklet about safety hazards at playgrounds and listed Pea Gravel has an ACCEPTABLE SURFACE. Versus concrete, packed Earth and grass as NOT ACCEPTABLE.
The Look & Feel Of A Pea Gravel Patio
Besides a pea gravel patio is easier, more affordable, safer, I just like the look and feel.
And by feel I do mean texture. I've been walking around barefoot on it. Is pea gravel soft like sand? Not exactly. But pea gravel isn't sharp and jagged like the gravel you're probably thinking of.
Gardenista.com defines Pea Gravel as: small, fluid stones found near bodies of water have an appealingly smooth texture, the result of natural weathering. Pea gravel comes in sizes from 1/8 inch to 3/8 inch, about the size of a pea, and in a range of natural colors like buff, rust brown, shades of gray, white, and translucent.
The key phrase there I believe is smooth texture.
The smooth texture and smaller size really gave me the look, and feel that I wanted in my tiny backyard. The color and size of pea gravel gives a beachy feel also, in my opinion. That just added to the appeal of using pea gravel to transform my small backyard.
Chapter 2: WHAT YOU'LL NEED FOR A DIY PEA GRAVEL BACKYARD ON A BUDGET MAKEOVER
WHAT YOU'LL NEED (What I Used):
- pea gravel
- weed blocker
- pavers
- straight edge shovel (or sod cutter)
- 1 - 4 x 4
- no dig edging
- rubber mallet
- wheelbarrow
Other things you might want:
- measuring tape
- spray paint
- level
Chapter 3: HOW TO DO A PEA GRAVEL PATIO (Step by Step)
1. Assess Where Your Backyard Patio Will Go
First thing I did was assess the area where I wanted the backyard pea gravel patio.
As I said, Mother Nature had already given us an ideal outline.
I also knew we wanted a gas fire pit.
Plus we wanted seating that could stay outdoors, handle the elements so we wouldn't have to take it inside every time it rained. Remember, we're in the Pacific Northwest... it rains often.
I measured the distance of everything, knowing I was going all the way to the fence. And then I used my spray paint to give me a rough idea of how it would look when finished - where the fire pit, bench, and chair would be.
2. Determine Size - How Much Pea Gravel Will You Need?
Once I knew where I was putting my patio, the next step was figuring out how much pea gravel I was going to need for my backyard patio makeover project.
The dimensions I came up with for my area were 11 x 19 and 11 x 8.
I found an online calculator to figure out how much pea gravel I would need for my project.
You can find an online pea gravel calculator here and here.
I recommend calculating how much pea gravel you'll need in cubic tons and cubic yards. (I'll explain more about this later.)
 So I calculated my two areas and added the numbers together.
I went with two inches deep because my yard was not level. I didn't plan on making it perfectly level either before I started adding the pea gravel. I just wanted to get low enough to be under my concrete patio and the paver edging I was added.
My two areas were calculated to 1.29 cubic yards and .54 cubic yards.
In cubic tons, it was 1.74 and .73.
When I called my local stone and gravel place they asked how much I wanted in cubic yards. That's why it's important to have both measurements, depending on how your local stone and gravel place sells it.
I ordered two cubic yards and had a bit leftover that my father-in-law took for a project at his house. I'd say the measurement and amount was perfect. I just ordered more than I needed.
3. Start Digging
.jpg) This part of the project is probably the hardest.
This part of the project is probably the hardest.
If you have a small yard, a straight edge shovel will do the trick. For a bigger yard, I'd recommend getting a sod cutter.
Could you just lay the pea gravel over the lawn without digging?
Possibly. But I wanted my pea gravel patio area to be at the same level of my current concrete patio.
If you were doing this project in an area where you're not worried about existing levels, then you probably could get away without digging. I would still use something to kill the grass and weeds. Then lay down the weed barrier.
And to be safe, you should check with diggershotline.com if you're going to do any digging.
4. Enjoy A Beer
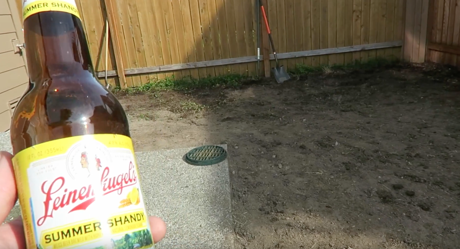 The entire point of this backyard makeover project is to have a place to relax and enjoy, might as well start now.
5. Lay Your Concrete Paver Edging
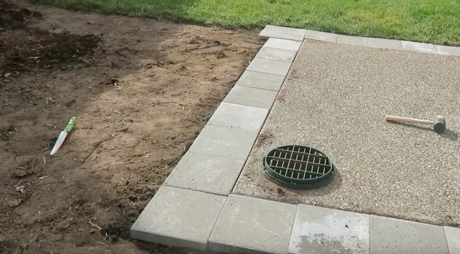 This was more of an aesthetic decision for my backyard project.
I wanted some separation and transition of the concrete patio and pea gravel patio.
6. Lay Your Weed Barrier
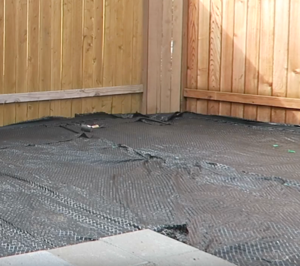
One of the main reasons for this project and to use pea gravel as the material for the patio was to make it as maintenance-free as possible.
So you don't want to skip this step. You can't skip this step if you didn't dig.
I made sure to get weed barrier that was good about letting water through.
7. Edge Your Pea Gravel Patio Area
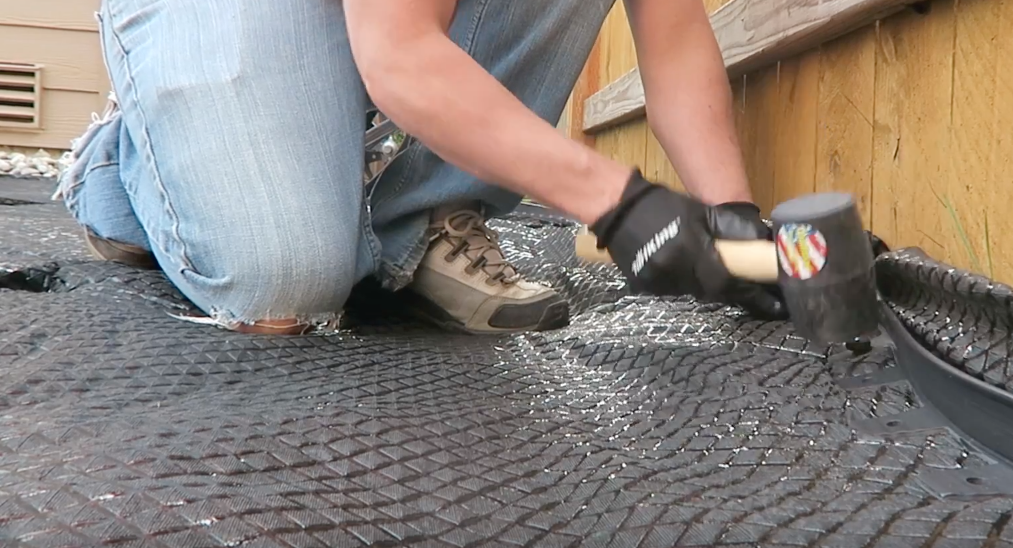
The next step before you start bringing your pea gravel in is to edge the area that you want your pea gravel patio to be.
Remember, pea gravel is small. It's going to move unless it's contained.
I actually used three different types of edging for my pea gravel patio.
The majority of the backyard got no dig plastic edging. It was simple to install and did the trick, especially when using the weed barrier.
Then of course I used the concrete pavers.

And finally, I used a 12 foot 4 x 4.
This piece of wood, the 4 x 4, was the edging I used to separate the pea gravel from the grass. And also to bring the look of the entire backyard makeover together when I built my DIY cinder block bench, which also contains 4 x 4's.
8. Get Your Pea Gravel Delivered
You can always go to Home Depot or Lowes or someplace like that to get your pea gravel by the bag.
I did not want to make several trips to the store and load up 50 - 100 bags of pea gravel.
I found a local stone and gravel business that delivered the exact amount I needed.
The cost for the pea gravel is cheaper, but with the delivery cost it's probably about the same as if you bought at the home improvement store.
So ultimately this came down to convenience and time savings for me.
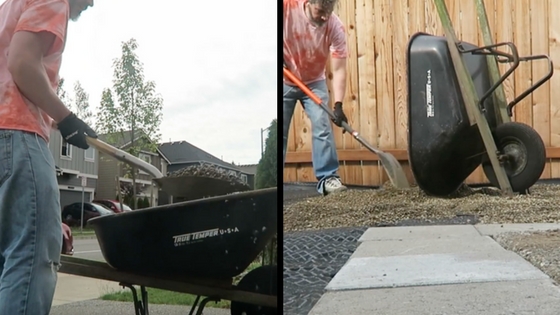
9. Shovel and Dump your pea gravel
Get ready to have a sore back and legs.
You're going to be shoveling, moving and dumping a few cubic tons of pea gravel.
10. Spread and level your pea gravel
11. Stage your backyard patio and enjoy it!

Chapter 5: HOW MUCH DID THIS BACKYARD MAKEOVER COST? (+ Where To Get Everything)
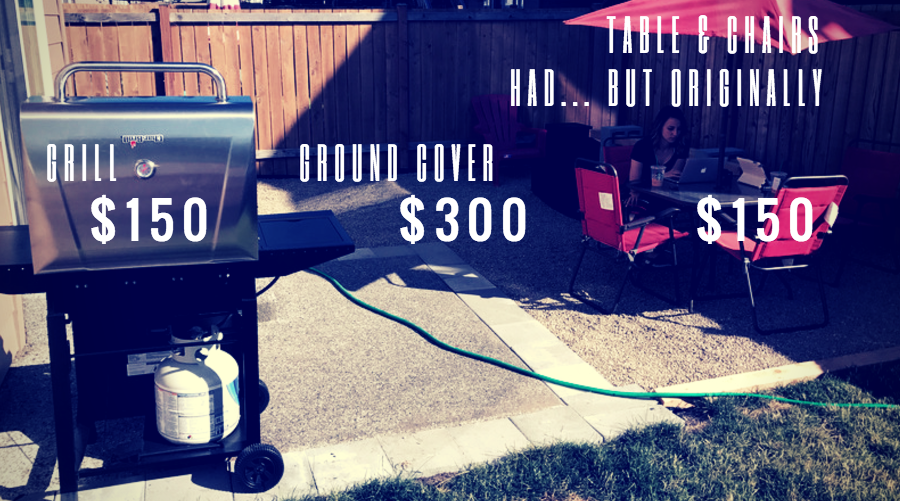
If you're like us, you're looking to a do a backyard makeover on a budget. We did this backyard makeover for under $1,000.
That's including a table, chairs and umbrella we already had.
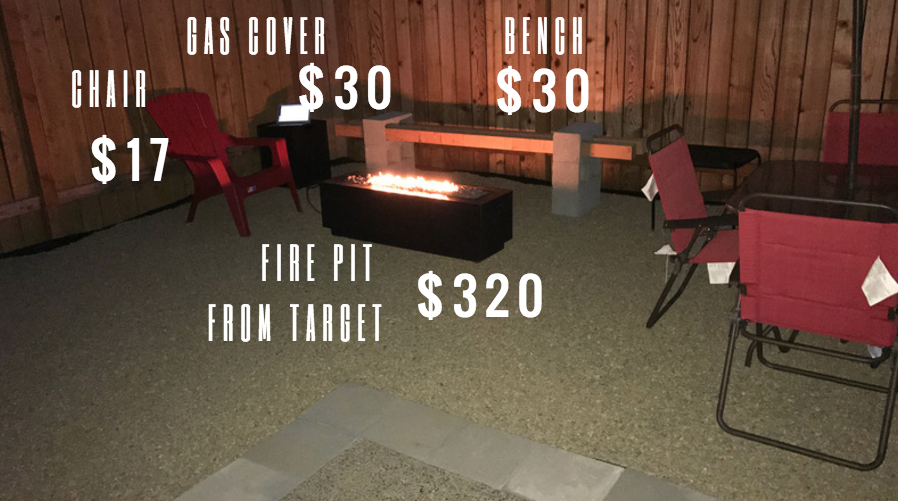
The red Adirondack chair is from Fred Meyer. $17
The grill was from Target. We got it on sale for under $150.

The gas fire pit was also from Target. It was $320.
If you notice, the style is very similar to the style of the gas fire pit we had at the Suncadia house. It's much smaller and I'm sure less expensive. But like I said, being there really inspired me.
The DIY cinder block bench is just six cinder blocks and 2 - 4 x 4's. I wanted something that fit with the style and look and was also basically weatherproof.
We are loving our backyard makeover and enjoy having extra living space in the form of the pea gravel patio.
I'm usually in the backyard having coffee in the morning, sometimes with the fire going.
And most nights, after we put Mo to bed, Katherine and I go and sit by the fire and catch up on the day.
We are also doing a lot of work in the backyard. I wrote probably half of this HOW TO sitting in the backyard.
DOING YOUR OWN BACKYARD MAKEOVER
One big lesson I've learned from having a small backyard in the Pacific Northwest is to work with what you've got. It can't be something it won't be just because it's what you want.
I wanted grass. Our little backyard was never going to give us that.
So I learned to work with what I had.
If you have a small backyard, a spot doesn't get much sun or grow grass maybe a backyard makeover using pea gravel could work for you.
This backyard project could easily take one full day to complete if you had everything lined up to go.
I had to wait on the delivery of the pea gravel so it was spread out over two weekends.
Watch the video of our diy small backyard makeover to get a better idea of what it took and how I did it.
If you have questions about this project, video or real estate - you can email us.
Or connect with Katherine and Darin on Instagram

